Vitrage Taart doosje (candy box)

Photobucket
Photobucket
Deze taart doos heb ik gemaakt
Van Restjes papier
pons van Martha Stewart pons Doily lace
Plaatje is van Internet gehaald

Penny Black

Photobucket
Dit kaartje is gemaakt met
ColorCore ColorCore pesto
het papier is van cosmo cricket
voor de mal heb ik van de nestabilities scalloped rectangles gebruikt.
de bloemen zijn van de retro pons en pons flower smal en medium van carl.
De stempels zijn van penny Black en ingekleurd met Distress Ranger inkt.
de lintjes komen van de markt

Magnolia Challenge A sketch

Photobucket
Dit kaartje is gemaakt met
ColorCore white
het papier is van janneke Brinkman en heb ik bij de action vandaan.
Een papier bewerkt met de Martha Stewart pons - Doily lace gebruikt voor het randje.
voor de mal heb ik van de nestabilities rechthoek gebruikt
de roosjes zijn zelf gemaakt. (zie mijn blog een roosje maken)
De stempel is van magnolia uit de wedding collectie en is ingekleurd met Distress Ranger inkt. en bewerkt met veel stickles
lint komt van de blokker.
De tekst is zelf gemaakt op de pc.

Magnolia challenge Birthday card

Photobucket
Photobucket
Photobucket
Dit kaartje is gemaakt met
ColorCore roze.
het papier is van janneke Brinkman en heb ik bij de action vandaan.
voor de mal heb ik van de nestabilities ovaal gebruikt
de roosjes zijn zelf gemaakt. (zie mijn blog een roosje maken)
de stempel is van magnolia uit de winter kit en is ingekleurd met Distress Ranger inkt. en bewerkt met veel stickles
lint komt van de markt.
I have make this card whis
Cardstock suger and spice
The paper is from Janneke Brinkman
I have uses the nestabilities ovaal
The roses Make by myself
the stamps are from Magnolia
there are colored whise Distress Ranger inkt
and i put A lot of stickles one it.

Magnolia challenge love card

Photobucket
Dit kaartje is gemaakt met
ColorCore red
het papier is van basisgrey sugerrush
De bloemen zijn gemaakt met de retro pons
de stempels zijn van Magnolia happy tilda en het hart en is ingekleurd Distress Ranger inkt
Het lint komt van het scrapbookatelier

Workshop dag Scrapbookatelier

Op 13-2-2010 had ik een workshop dag bij het scrapbook atelier in klarenbeek en daar hebben we dit gemaakt.
deze workshop werd gegeven door agnes
Een kaarten opbergbox
Photobucket
het papier is van basisgrey sugerrush
de bloem is gemaakt van de retro pons
de stempels van Lili of the Valley en is ingekleurd met Distress Ranger inkt
het malletje is van nestabilities Deckled Rectangles
Een mooie kaart
Photobucket
Photobucket
Dit kaartje is gemaakt met
ColorCore suger and spice
het papier is van basisgrey sugerrush
De roos is zelf gemaakt
de stempel is Penny Black en is ingekleurd Distress Ranger inkt
Het lint komt van het scrapbookatelier
en nog een kaart
Photobucket
Dit kaartje is gemaakt met
ColorCore red
het papier is van basisgrey sugerrush
De bloemen zijn gemaakt met de retro pons
de stempels zijn van Magnolia happy tilda en het hart en is ingekleurd Distress Ranger inkt
Het lint komt van het scrapbookatelier

Make your own Roses

Hi everybody!

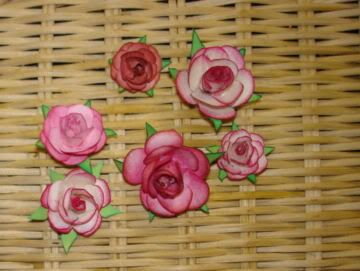
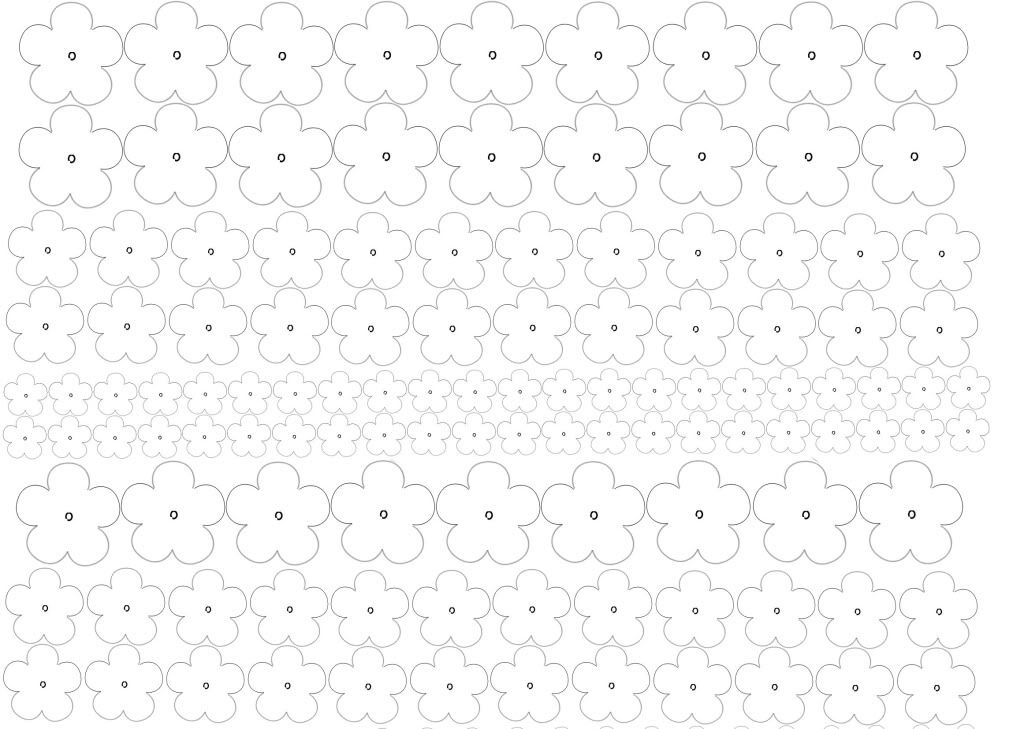
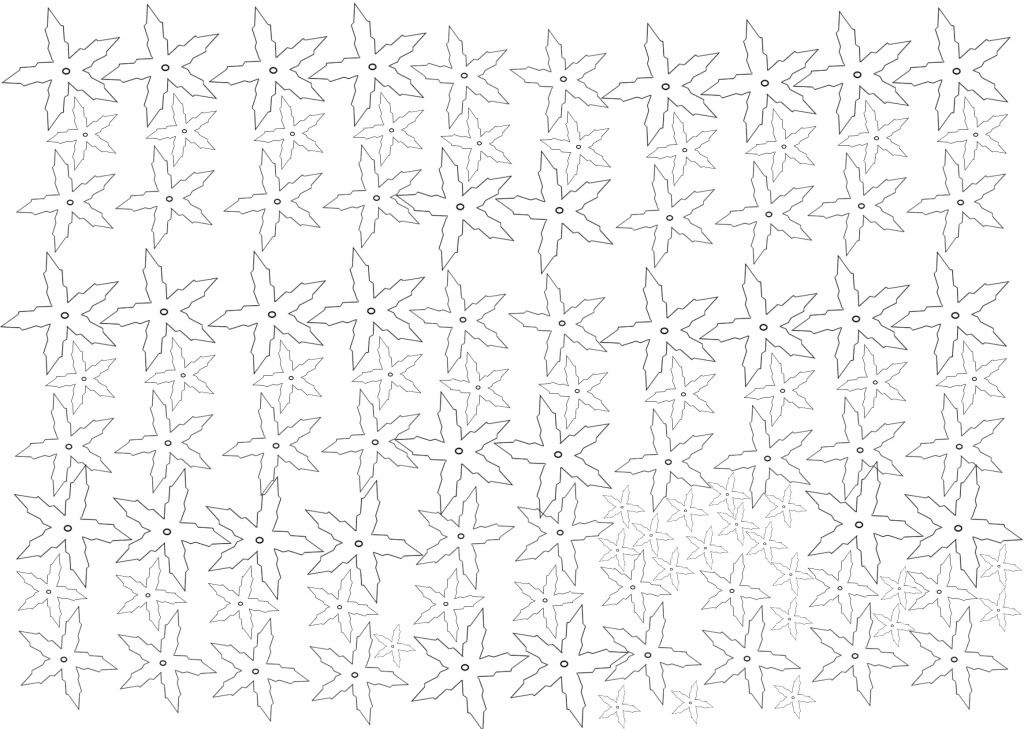
Here I am again, and now we are going to make a different kind of rose. I hope you will enjoy making these paper roses! Because I can never find the right punch to make my roses, I have designed my own roses and leaves. (you could download and print these)
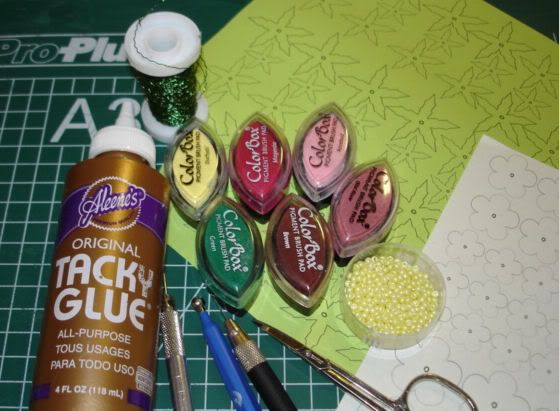
What do we need?
This time I have used a different kind of paper, namely white paper (no cardstock) of “Papicolor”. It can be purchased at the bookstore, “Primera”, for just 0,25 euro and you can make a lot of roses out of it. Load this paper in the printer and print the rose flowers. For the leaves I have used green paper, no cardstock. Load the printer again and print the leaves.
Next, we do need: different colors of ink, glue, a knife, a piercing tool, beads, and thin iron wire (I have bought this at “Intratuin”)
Photobucket
Ok, let’s get started!
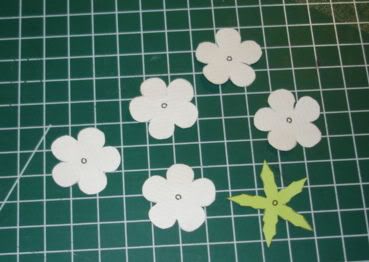
You have to cut 5 flowers of the same size and 1 big leaf. Now, use your knife to make an incision in 5 flowers and punch a hole in the black circle. Next, you need to cut the leaf with your scissors.
Photobucket
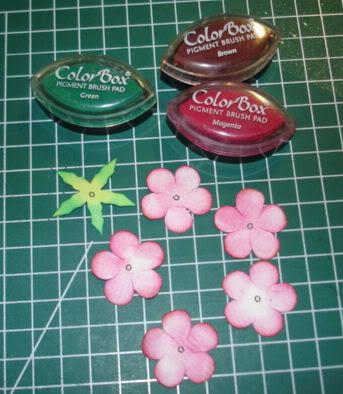
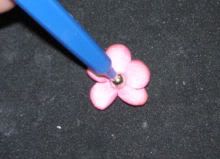
Choose the ink to color the rose and use your ink pad carefully to start adding color to the flower and also add color to the edges, but just a little bit more, so you will get the darker color. Do the same thing with all your flowers, use a darker color on the edges of your flowers, I have used red and brown, and use the green color on your leaves.
Photobucket
The next step is to clean your hands with a baby wipe, because your fingers are now probably red and green. Take a piece of the iron wire and thread your bead and tie a knot. Now you need to take 1 flower and put just a little bit of the glue on both sides, next thread the flower through the hole and turn the flower between your fingers, until you can’t see the bead anymore (the bead will prevent the flower at the top from falling).
Next, this time take 1 flower, put some glue on both sides and thread the flower and turn it a little bit. Set the flower aside to dry while working on the rest of the flower pieces.
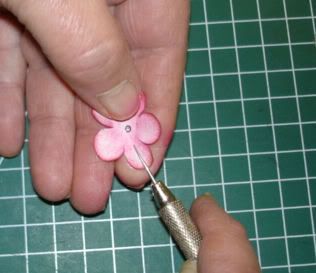
We have got three more flowers to prepare. The next step is to take 1 flower and make 3 veins in every petal with your piercing tool (the easiest way is to put the petal in your hand and then keep 1 petal on your finger and press softly), do the same thing with the two other petals.
Photobucket
With the last flower you turn the edge of the leaf a little bit, but very carefully (you can compare it with making curls in a ribbon with your scissors).
Photobucket
The next step is to take your tiny ball and press it on a soft foundation (for this I have used my Cuttlebug mat) in the center of the flower. The last step is to put the flowers together.
Put some glue on both sides off you big leaf next thread the big leaf through the hole and ready.
Finally, you have a beautiful paper rose, called “Ria Rose”. :)I want to thanks Laura for the tranlations
Photobucket
Photobucket
Photobucket

Girlfriends

Photobucket
Dit kaartje is gemaakt met
ColorCore suger and spice
het papier is van basis grey lemonade
roosjes is zelf gemaakt en aan de buiten kant zijn ze beinkt en het takje heb ik gekregen van Laura.
de kleine bloempjes zijn met de mal van crealies gemaakt en heb ik gekregen van marjon en beinkt en bewerkt met stickles
de stempels zijn van magnolia en is ingekleurd met Chalk en derwent potloden.
de tekst stempel komt van Laura
het bloementjes kant komt van de markt

Wilma the dog

Photobucket
Dit kaartje is gemaakt met
ColorCore Honey
het papier is van My Mind`s Eye
ik heb de Martha Stewart pons - Doily lacee gebruikt voor het randje.
roosjes zijn zelf gemaakt en aan de buiten kant zijn ze beinkt en het takje heb ik gekregen van Laura de kleine bloempjes zijn met de retro pons small en beinkt en bewerkt met stickles
de stempel is van magnolia uit de Raising the Ceiling Collection en is ingekleurd met derwent potloden.
de tekst stempel komt van Eline

Magnolia challenge Easter basket

Photobucket
Photobucket
Photobucket
Photobucket

Easter Tida

Photobucket
Dit kaartje is gemaakt met
ColorCore ColorCore rich amethyst
het papier is van cosmo cricket
voor de mal heb ik van de nestabilities seven gebruikt .
de bloemetjes rechts zijn gemaakt met een mal voor de cb
de bloemen links zijn van de retro pons takjes van joy en de roosjes zijn zelf gemaakt
de stempel is van Magnolia en is ingekleurd met derwent potloden.
de lintjes komen van de markt

Tilda

Photobucket
Dit kaartje is gemaakt met
ColorCore suger and spice
het papier is van Sei
ik heb de Martha Stewart pons - Doily lacee gebruikt voor het randje.
het bloementje zijn van een cuttlebug mal,en is gekleurt met chalk
bloempje en het takje heb ik gekregen van Laura
de stempel is van magnolia uit de wedding collectie en is ingekleurd met derwent potloden.
de teks stempel komt van Eline
Het lint en de zonnebloem komen van het scrapbookatelier